Thursday, July 9, 2015

Photographing your work

Some five weeks ago I bought a new compact camera. Not that the one I had was broken or anything, but I wasn't satisfied with the video quality. The new camera is absolutely amazing. HD video quality and fantastic stabilizing.

It also has a time lapse mode. That was new to me, so I had to figure out how it worked. I had planned to make an oil sketch for a possible commission (which I didn't get...) and I thought it might be a good idea to film the making-of as a time lapse. Great fun to see myself as a Comedy Capers character working like mad on this little painting. Hope you enjoy it too.


Now let's get serious: taking pictures of your work can be quite frustrating. The colors are off, the image is unsharp, annoying reflections, what have you. There are a few simple groundrules that can make your life easier, at least when it comes to taking pictures of your work.

Here we go:
- The quality of the light is the most important factor. Bad lighting, bad picture. The best light can be found on an overcast day with diffuse light. Take your painting outside and you'll be amazed by the quality of the pictures.
- When you shoot indoors, make sure you use daylight lamps. Most everyday light bulbs are way to yellow.
- No direct flash. Direct flash equals reflections. 
- Use a tripod. A stabilized camera allows you to use a wider diafragm and higher shutterspeed. Which leads to sharper pictures.
- Treat yourself to a photo software program. It will allow you to adjust  not only lightness and contrast, but color hue as well. I use Photoshop Elements. It has all the features I need and is relatively cheap. Indispensable for fine tuning your pictures.

Success!

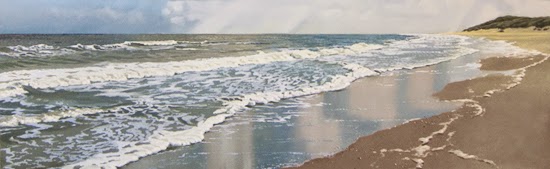
Changing Weather, oil on panel, 15 x 45 cm


Thursday, June 25, 2015

Painting Questions

Got an email with a number of painting questions from David Barclay. David is a great still life painter. His paintings of musical instruments are really impressive. If you're interested: http://davidbarclayart.com/

Most of his work is in acrylics, but lately he started working in oils. He kindly gave me permission to quote some of his questions.

1. "What would you recommend regarding the series of the oil paints that I purchase?  I have no sense of how much difference there is between a series 1 and a top of the line series 8, so this is a real puzzle to me.  My guess is that it makes more of a difference for some colors than others, but don't know.  What improves as you go up the series "ladder?"
Problem is that manufacturers have different ways of dividing their paints. The only one I know that works with 'series' is  Royal Talens with their Rembrandt line. Series 1 are the whites, series 2 the yellows and so on. In this case it's not a matter of the higher the number the better the quality. My advice is to buy the earth colors, the flesh colors and the greens from a cheaper brand like for example Lukas. Their Lukas 1862 brand has an excellent price-quality rate. When you get to the warm colors it pays off to buy a more expensive brand, like Old Hollandt. Their paints are packed with pigment.
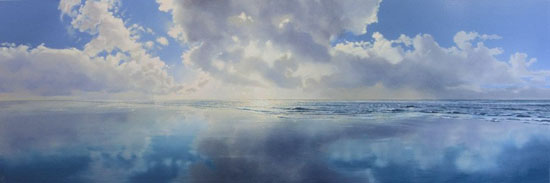
Reflections #2, oil on panel, 50 x 150 cm

2. From watching the videos, it appears to me that when you use W&N Liquin Original, your paintings dry overnight so that they can be worked on again the next day.  Is that right?
Yes. I used to work with traditional media. They took ages to dry. I was forced to work on two or three paintings at a time. Now I can continue working the same painting the next day. Much better.

3. "In your first video you used Liquin Original and in the second Liquin Light Gel.  Did I understand that you have basically switched to the Gel, or do you use them in different situations? Why?"
 Yes, I switched to the gel. For me it works better in getting smooth surfaces, especially with large paintings. I also like the gel better when it comes to glazing. The price is the same. You have to store it in the dark. It hardens under the influence of light.

4. "Do you use alkyd oil paints? Why or why not?
Yes, I have used alkyds. I found it harder to get the smooth transitions I want. Plus they smell funny... But that's personal. I know people who prefer alkyds over oils. One of the advantages is that you can apply a finishing varnish after a few monthts, where as with oils you'll have to wait at least a year.

Evening Breakers, oil on panel, 15 x 40 cm

5. "I noticed as I looked at some suppliers listings of oil paints that there are toxicity ratings that the state of California requires be listed for certain colors.   I could not help but think of your frequent use of your thumb.  Do you do anything to minimize this possible danger?  I would say that I am not an extremist on this front, but would prefer to err on the the side of safety.  (Our joke here is that there are certain chemicals that only cause cancer in California.  A bit of black humor!)"
Since the days my dad worked as a house painter, health hazards have been greatly diminished. Legislation in Europe as well as in the USA and other countries has become much stricter. It never entered my mind that my thumb technique could be a health hazard. Been doing it for over twenty years. I often wash my hands after using my thumb, but that's because my brushes get slippery if I don't.

So much for the Q and A. If you have questions like this, please feel free to ask them. On this blog or through my email: info@janhendrikdolsma.nl.

Thursday, June 11, 2015

About brushes

Got an email from my good friend Marc, with a few questions about my tutorial videos. He kindly gave permission to quote him.

Lyon brush/stippler
"It seems to me that when you are doing your first layer of both sky and sea, you could be getting it done a lot quicker if you used a larger brush with big strokes. Instead you used a very small brush making little strokes coming from many directions  QUESTION: Why?"

I use a small brush to get more control over the transition from light to dark. It enables me to take small steps, slowly changing the color from light to dark. It makes the transition more gradual.

"It seems to me that you could blend all your colors together without the need for stippling. QUESTION: Why all the stippling?"  

The stippler is important to make the transitions as smooth as possible. Every time you add a slightly darker color you'll get a visible edge between the two shades. These edges are blurred by using the stippler. When you skip the stippler, and only use the badger hair fan brush, you'll get good results as well. With the stippler you'll get great results.


Do you have questions like this? I'd be happy to answer them if I can. Or you could download one of my tutorial video's at www.paintingskies.com/video

Thursday, May 28, 2015

Solo show at 'De Twee Pauwen' Art Gallery

Last Sunday was an exciting  day for me. My fifth solo show at 'De Twee Pauwen' Art Gallery opened. De Twee Pauwen (The Two Peacocks) is a beautiful gallery in Den Haag center, close to the Royal Palace. The weather was great, lots of sunshine, hardly any wind. No gallery-weather at all. Gallery owners like a clouded sky and wind.

Anyway, despite the beautiful weather, the turnout wasn't bad at all, the music and the sales were great and I had a really good time. I've been working my boots off these last few months and this was my reward. Check the recent work section of my website for an overview of the exhibition.

Here's a short impression of the event.


Friday, May 15, 2015

Reflections video online

In the last few months I kept you posted on the new video we were working on. We started back in January and now it's finished and available at www.paintingskies.com/video.. Can't help but to feel a little proud...

Step by step I take the viewer through the painting process, from a blank panel to the finished work. The subject this time is painting reflections. To quote myself: "Painting reflections isn't exactly easy but it's no rocket science either. You just have to observe a few ground rules."  

Every now and then the video wanders off to images of the island that has been the inspiration for many of my paintings, the Wadden Sea island Vlieland. It has been of great importance to my life and my work, going back to the drawings I made there as a five year old.

 Here's the YouTube trailer. Let me know what you're thinking!


My dear friend Theo van Egeraat shot the video, just like he did the previous one. Beautiful footage, with a sharp eye for the painting process.

The music was composed by Udo Pannekeet, one of the best contempory Dutch bass players. His music, with the warm sound of his fretless bass, takes the video to another level.

The finished painting will be part of my solo at De Twee Pauwen Art Gallery in The Hague (Netherlands) from May 24 - July 7, 2015. 

Friday, May 1, 2015

Varnishing-day

Been working hard for my solo show next month in The Hague (Netherlands). Beautiful gallery in the old center, close to the Royal Palace. Projects like this are very inspiring. The final painting is almost ready and now it's time for the stuff that I don't like. Varnishing for example.

I carefully read the weather forecast when planning 'Varnishing-day'. Temperatures have to be mild (and that can be a problem during Dutch spring), little wind, no rain. When the day arrives I open all the doors and windows, take a deep breath and go for it, hoping the draft will chase the fumes. In the past I sometimes wore a face mask, but I had trouble breathing, wearing it.


Beach with Tyre Tracks, oil on panel, 50 x 150 cm

There is an infinite number of varnishes on the market today, but basically, there are two kinds for oil paint: retouching varnish and finishing varnish. You got to wait at least a year before applying a finishing varnish (oil paint takes forever to dry), so most of my paintings leave the studio with just a layer of retouching varnish. No problem.

Retouching varnish comes as a glossy varnish only, and I don't want the surface of my paintings to shine like a mirror, so I add terpentine or white spirit, up to 30%. I use a broad hog hair varnishing brush and a small paint roller to add a fine texture to the the surface.

Windy Beach (excision), oil on panel, 90 x 120 cm

Once the job is done, I quickly forget the smell and the fumes. Colors are intensified and I like the satin gloss. But the best moment is yet to come, when I enter the gallery and see the work in the great setting of De Twee Pauwen Art Gallery. From May 24 - July 7.

Want to see more of the work I did for this exhibition? Check www.paintingskies.com.

Thursday, April 16, 2015

Reflections, the video #2

In my February 5 blog entry I wrote about the new long video we were shooting. Well, the painting is finished and we did a first edit. Next step is the voice over and of course the background music.

I hope it'll be online sometime in May. Here's the painting.

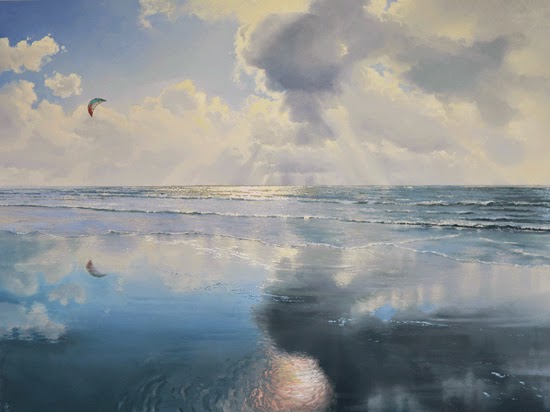
Reflections, 120 x 90 cm, oil on panel

That's all for now. Busy. More in two weeks!